
Real Estate Edition
Part 3, Composition – Bedrooms and Bathrooms
The composition of the shot is the next order of discussion. In the first session, we discussed camera height and the importance of keeping the phone level. Last time we discussed lenses and focal length. In the next few sessions, we are going to discuss more “Rules” of composition for Real Estate Photos. Most of the photos we will be reviewing were not shot with a cell phone. The rules of composition regarding Real Estate Photography are platform-independent. A good shot is a good shot and bad is bad regardless of what camera was used.
Ignore the clutter in the first few photos. This is my house and it is not cleaned or staged for photos. I’m only showing composition here.
There are 2 common composition types used in interior Real Estate Photography. One-point Perspective and Diagonal. Most of the time you want to shoot the room from an angle, rather than straight on. This tends to make the room look larger. You want to include 2 or 3 walls in your composition with the third wall being just a small portion of the picture. This gives the viewer a sense of scale to the room.
You will notice that the curtains are closed. There is nothing outside worth showing in this instance and getting a nice outside view with a cell phone while keeping the inside from being too dark takes some advanced tricks that I will be showing in a future lesson.
Bedrooms


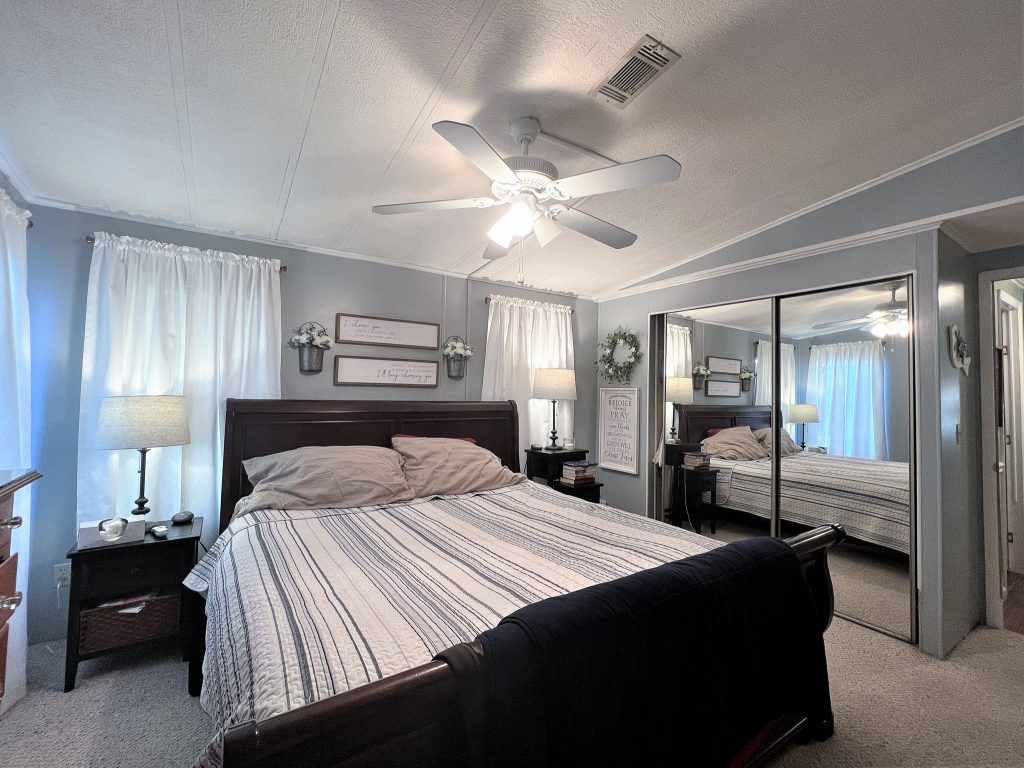
The first picture is a One Point Perspective. This shot doesn’t work well in this room. It would be much better if the camera could have been moved back a few more feet. The wall behind the camera prevents going any further back. I also raised the camera a bit to minimize the footboard in the foreground. The other issue with being so close to the bed is it makes the bed look really long and skinny. The key to a good One Point is being perfectly parallel with the wall opposite the camera and centered between the side walls. It is somewhat difficult to do well with a phone.
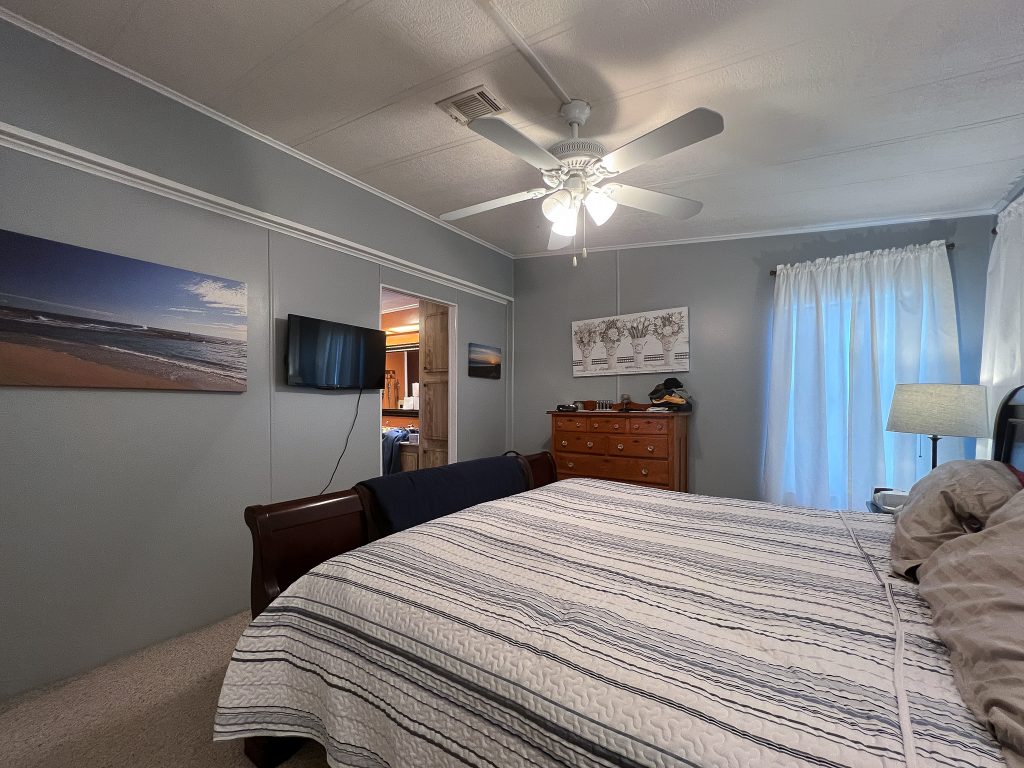
The second photo is taken from the entry to the bedroom. This is a good angle for most rooms as it’s how a person first sees a room. The camera height is about 45″, the vertical lines are all vertical and it’s showing just a touch of the wall on the right giving the viewer the information they need to see the scale of the room. This is also the only type of shot I typically provide for secondary bedrooms. The exception to that would be if the secondary bedroom has access to a bathroom or other feature that cannot be seen from the doorway photo.
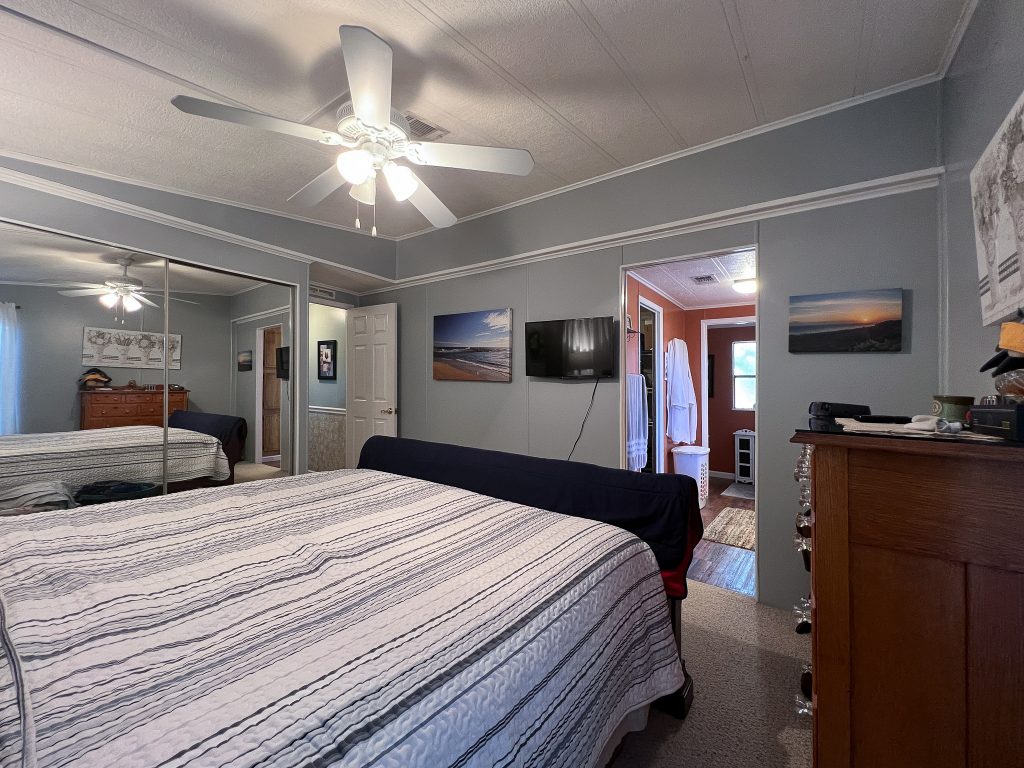
The third photo is taken from the bathroom door. It is too close to the footboard and at too shallow of an angle. Notice how the footboard appears much higher on the right side and the bed looks twisted. I could have backed up a little further into the bathroom but then the bedroom door wouldn’t be in the shot. This would be a perfectly fine shot if the bed wasn’t there.
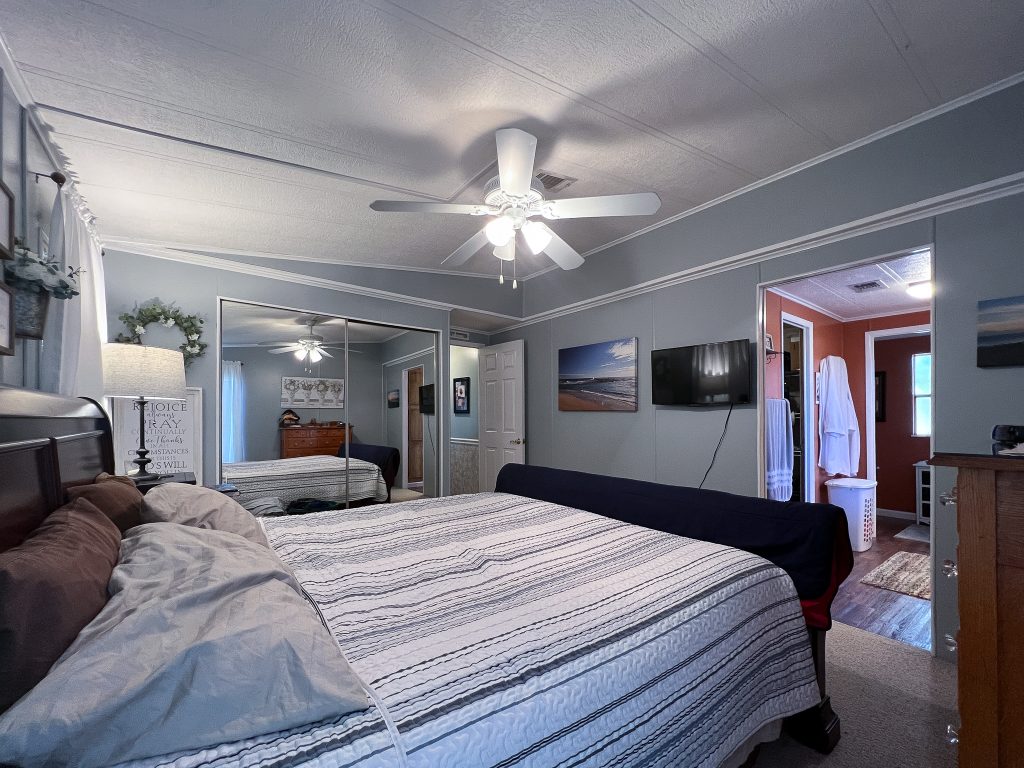
The fourth shot above gives the viewer information they wouldn’t get from any of the other shots, the wall with the TV and the bathroom entrance. However it’s not that interesting of a shot. It’s not very different from the shot from the bedroom door. I can’t really describe it, it’s just meh. If you’re only going to give two views of the room opposing angles make a better choice, as shown next.
Oh No! Mirrors


This next set shows an issue you will sometimes encounter. The large mirrored closet doors. The first image is not framed badly, however it should have been twisted to the right a bit more. The big problem is the photographer in the mirror. Totally unacceptable. In the second image I tried to hide in the corner but also unsuccessfully. You can still see me as well as the camera and tripod. This image wouldn’t be too hard to photoshop me out, but if you’re working with a cell phone, you want to get it right in camera if at all possible. Another failed attempt.
Now onto the third image. I panned the camera to the right just far enough where I couldn’t be seen in the mirror. In doing so I ended up with a large slab of the dresser on the right side. I also lost the headboard of the bed, losing the reference of the third wall.
Now onto the successful shot, the fourth image. I ended up removing the lamp from the nightstand and was able to move the tripod all the way into the corner. This resulted in being able to show the headboard, only having a little bit of the dresser showing, and not a trace of me or the camera. There was no room for me by the camera. I was actually in the walk in closet and used my remote trigger.
In summary, for a Master Bedroom you want at least 2 shots from opposing angles and sometimes a third shot is helpful. In this case I would have also included the one from the head of the bed facing the bathroom. For most secondary bedrooms I would typically only take one shot from the doorway, unless there were other features that needed to be shown such as access to a bathroom.
Put the seat down!
Bathrooms are one room where 30 seconds to a minute of prep make a huge difference.


In the first image there are several problems that only take a few seconds to correct. Nobody wants to see inside your toilet bowl, trust me. Personal items like the soap dispenser, toothbrushes, hair brushes, etc. should all be hidden. While everybody knows there is toilet paper in the bathroom, if you can remove the TP Holder do it, if not make sure the paper is rolled neatly and not hanging down from the roll.
In the second image I closed the toilet lid, moved the TP holder and soap dispenser out of view. I should have also removed the bath mat, the paper towel and fully closed the shower curtain. The shower curtain should be closed unless the shower has details that you want to feature. This one is just a plain fiberglass enclosure, so nothing worth showing. A Master Bath is more likely to have a nice shower worth featuring, such as in the next image.


The first picture is a very nice Master Bath. This photo was taken from the doorway. The next photo was taken from inside the shower. I wanted to show the towel bar and the location of the water closet. I raised the camera a bit above the knee wall in order to see the sink and counter on the right. Take a close look at the medicine cabinet. I didn’t notice this on site and had to remove my reflection in Photoshop later. The lesson learned is always review your photos before moving on.


This next bathroom is straight from photographers’ purgatory. There are mirrors on every wall. I could not find any location to take a photo without being in at least one mirror. This is another instance of Photoshop being required to edit out the tripod.
In this last picture, because of the angle, the mirror is not an issue, however, look closely at the shower doors. There’s that photographer and his tripod again. To fix this on site I could have moved the shower doors to the other side. That might have made the reflection go away. I could have moved to the right just enough to be out of the reflection as well, although that would have changed the view into the bathroom. If I could have blocked the light from the bedroom window that would have taken the reflection away while preserving the framing of the shot.
My point is that you must pay attention to reflections and try your best to avoid them in the first place. Fixing them after the fact can be very time-consuming.
Next session we will be discussing the composition of Kitchens and Living/Family Rooms.
If you decide that taking your own Real Estate Photos is not for you, and you’re in the Hernando, Citrus or N. Pasco County area, contact me and we can discuss your needs.